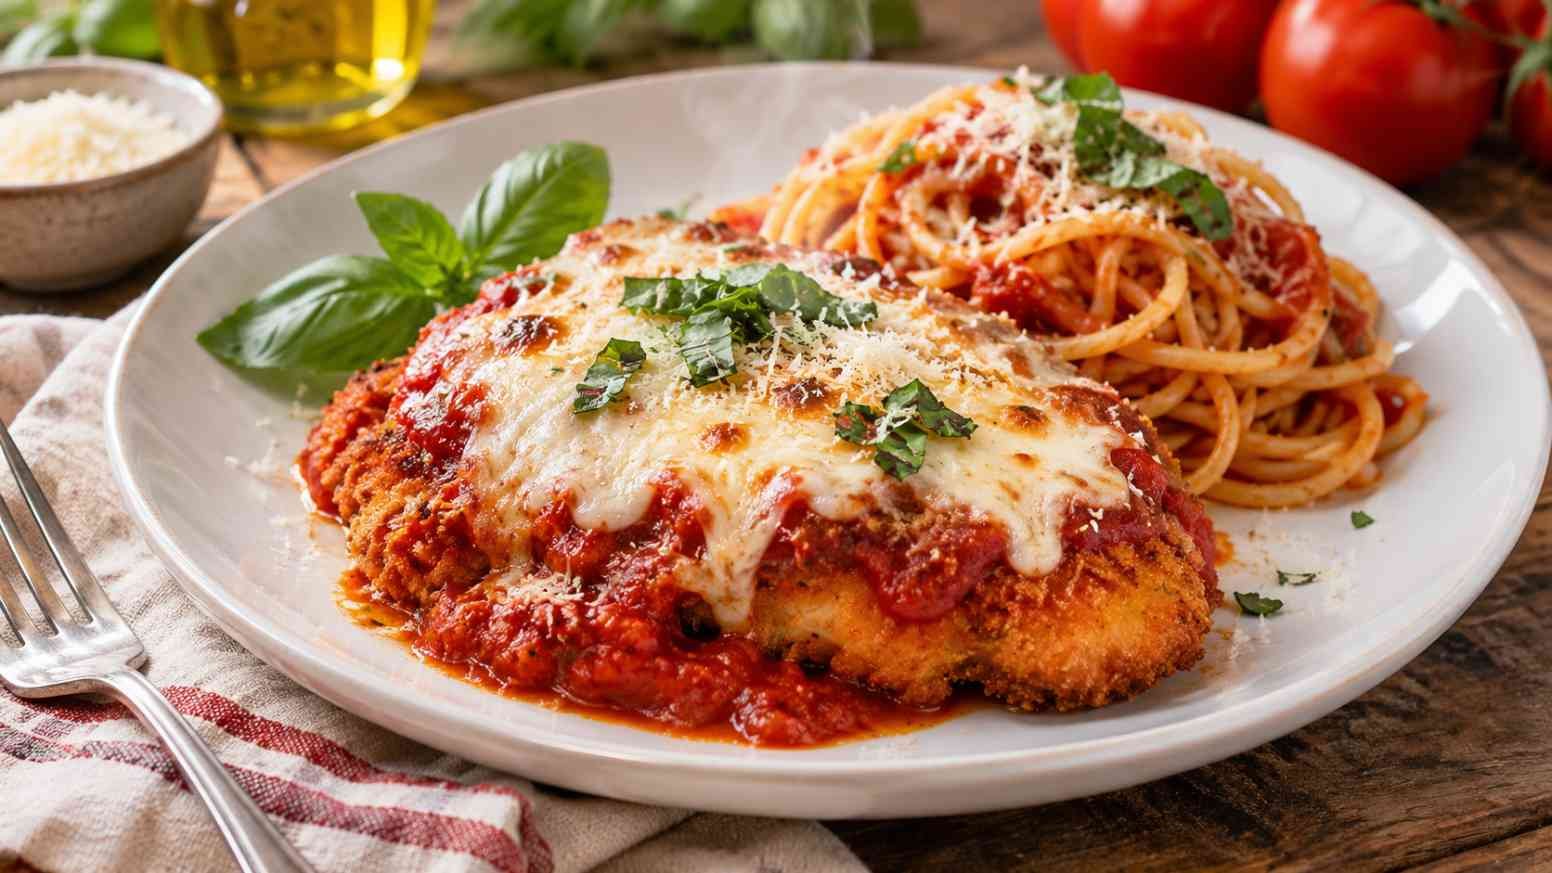
There is something wonderfully satisfying about cutting into a piece of Chicken Parmigiana. The mozzarella stretches as you lift your fork, the tomato sauce is rich and fragrant, and underneath it all is a golden, crunchy piece of chicken. It’s the sort of dinner that feels like a treat, even when you’re eating at home on an ordinary weeknight.
Also known as Chicken Parmesan, this Italian-American favorite combines breaded chicken cutlets with tomato sauce, mozzarella, and Parmesan cheese. The chicken is first cooked until the coating turns crisp, then finished in the oven with the sauce and cheese. The result is a comforting meal with plenty of flavor and just the right contrast between a crunchy crust and a soft, cheesy topping.
Making Chicken Parmigiana from scratch involves a few steps, but none of them are particularly difficult. The important part is getting those steps in the right order. A good tomato sauce, evenly flattened chicken, and properly heated oil make a noticeable difference to the finished dish.
Chicken Parmigiana Recipe Details
| Preparation Time | 25 minutes |
| Optional Seasoning Time | 20 minutes |
| Cooking Time | 35 minutes |
| Total Time | 1 hour, plus optional seasoning time |
| Servings | 4 |
| Course | Main Course |
| Cuisine | Italian-American |
| Cooking Method | Shallow Frying and Baking |
| Difficulty | Moderate |
Ingredients for Chicken Parmigiana
This recipe uses everyday ingredients, although choosing a good mozzarella and Parmesan makes the finished dish noticeably better. Freshly grated Parmesan gives the breadcrumb coating a savory flavor, while low-moisture mozzarella melts beautifully without making the chicken excessively wet.
For the Chicken
- 2 large boneless, skinless chicken breasts (about 600 g total)
- 3/4 teaspoon salt
- 1/2 teaspoon freshly ground black pepper
- 1 teaspoon dried Italian seasoning
- 1/2 teaspoon garlic powder
- 1/3 cup all-purpose flour
- 2 large eggs
- 1 tablespoon milk
- 1 cup panko breadcrumbs
- 1/3 cup finely grated Parmesan cheese
- 1/2 teaspoon paprika
- About 1/3 cup olive oil or neutral cooking oil for shallow frying, adding more if necessary
For the Tomato Sauce
- 1 tablespoon olive oil
- 1 small onion, finely chopped
- 3 garlic cloves, minced
- 400 g tomato passata or crushed tomatoes
- 2 tablespoons tomato paste
- 1/2 teaspoon dried oregano
- 1/2 teaspoon dried basil
- 1/4 teaspoon red pepper flakes (optional)
- 1/2 teaspoon sugar, only if needed to balance acidity
- Salt and black pepper to taste
- 2 to 3 tablespoons water, if required
For the Cheese Topping
- 1 1/2 cups shredded low-moisture mozzarella cheese (about 170 g)
- 1/4 cup freshly grated Parmesan cheese
- A handful of fresh basil leaves
- 1 teaspoon olive oil, optional
Also Read: Parmesan Chicken Breast
How to Make Chicken Parmigiana
The process is straightforward once everything is prepared. Make the sauce first, then bread and fry the chicken. By the time the chicken is ready, the sauce will have had enough time to develop a deeper flavor.
Step 1: Prepare the Chicken
Place the chicken breasts on a cutting board and slice each one horizontally to create two thinner cutlets. You should have four pieces of roughly equal size. If any section is noticeably thicker than the rest, place it between two sheets of baking paper and gently pound it with a meat mallet or rolling pin until the thickness is approximately 1 to 1.5 cm.
Even thickness matters because thin areas cook much faster than thick ones. Season both sides with salt, black pepper, Italian seasoning, and garlic powder. If time allows, refrigerate the seasoned chicken for 20 minutes before breading. This short resting period helps the seasoning penetrate the meat. Pat away any visible surface moisture before coating.
Step 2: Prepare the Tomato Sauce
Heat one tablespoon of olive oil in a saucepan over medium heat. Add the chopped onion and cook for 4 to 5 minutes, stirring occasionally, until softened. Add the garlic and cook for another 30 seconds, just until fragrant.
Stir in the tomato paste and cook for about a minute. This helps mellow its raw flavor. Add the tomato passata, oregano, dried basil, and red pepper flakes. Season lightly with salt and black pepper.
Reduce the heat and let the sauce simmer gently for 12 to 15 minutes, stirring occasionally. If it becomes too thick, add a little water. Taste before adding sugar; well-balanced tomatoes may not need any. The finished sauce should be thick enough to sit on the chicken without running off the sides.
Remove the sauce from the heat and set it aside while you prepare the chicken.
Step 3: Set Up the Breading Station
Arrange three shallow bowls on the counter. Put the all-purpose flour in the first bowl. In the second, whisk the eggs with the milk until combined. In the third, mix the panko breadcrumbs, Parmesan cheese, and paprika.
Working with one chicken cutlet at a time, coat it lightly in flour and shake off the excess. Dip it into the egg mixture, allowing any extra egg to drip back into the bowl. Finally, press the chicken firmly into the breadcrumb mixture until both sides are evenly covered.
Place the breaded cutlets on a wire rack or clean tray and leave them for about 5 minutes. This brief rest helps the coating adhere during frying.
Step 4: Fry the Chicken Until Golden
Pour enough oil into a large, heavy-bottomed frying pan to form a thin, even layer across the base. Heat over medium to medium-high heat until the oil reaches approximately 175°C (350°F). If you do not have a thermometer, drop in a few breadcrumbs. They should sizzle immediately without burning.
Carefully add one or two chicken cutlets, depending on the size of your pan. Avoid overcrowding, which lowers the oil temperature and prevents the coating from becoming crisp.
Fry for approximately 2 to 3 minutes per side, until the breadcrumbs are golden brown. The chicken may not be fully cooked at this point; it will finish cooking in the oven. Transfer it to a wire rack and repeat with the remaining pieces, adding a little more oil if needed.
Using a wire rack instead of placing the chicken directly on paper towels allows steam to escape and helps keep the underside crunchy.
Step 5: Add the Sauce and Cheese
Preheat your oven to 200°C (400°F), or 180°C (350°F) for a fan-assisted oven. Arrange the fried cutlets in a lightly oiled baking dish or on a lined baking tray, leaving a little space between them.
Spoon 2 to 3 tablespoons of tomato sauce over the center of each cutlet. Spread it gently but leave some of the golden edges uncovered. This small detail keeps part of the breadcrumb coating crisp after baking.
Divide the mozzarella evenly over the sauce, then sprinkle with the remaining Parmesan. Add a very light drizzle of olive oil if desired.
Step 6: Bake Until the Cheese Melts
Place the chicken in the preheated oven and bake for approximately 8 to 12 minutes, or until the cheese has melted and the chicken reaches an internal temperature of 74°C (165°F) at its thickest point.
If you prefer a lightly browned cheese topping, switch on the grill or broiler for the final 1 to 2 minutes. Keep a close eye on it, as the cheese can brown quickly.
Remove the chicken from the oven and let it rest for about 2 minutes. Scatter fresh basil over the top just before serving.
Also Read: Slow Cooker Honey Buffalo Chicken Sliders
What You Can Do Better
Chicken Parmigiana is a simple dish in principle, but a few thoughtful adjustments can make the difference between a soggy, overcooked cutlet and one that stays juicy with a crisp, flavorful coating.
Keep the Chicken an Even Thickness
One of the most common mistakes is leaving the chicken too thick in the middle. By the time the center cooks, the thinner edges may already be dry. Cutting and gently flattening the chicken also creates more surface area for the coating, which means more of that satisfying crunch in every bite.
Choose Panko for a Crunchier Coating
Regular breadcrumbs will work, but panko gives the crust a lighter, more open texture. Because the crumbs are larger, they tend to crisp up nicely in hot oil. Mixing Parmesan into the breadcrumbs adds extra flavor and helps the coating develop a beautiful golden color.
Don’t Rush the Tomato Sauce
Tomato sauce should taste like more than just cooked tomatoes. Allowing the onion to soften properly and cooking the tomato paste before adding the passata builds flavor without requiring a long simmer. You want a sauce that is concentrated and savory, not watery or overly sweet.
Use Low-Moisture Mozzarella
Fresh mozzarella tastes wonderful, but it contains more water than the shredded, low-moisture variety. That extra moisture can soften the breadcrumb coating during baking. For this particular dish, low-moisture mozzarella gives a more consistent melt and helps preserve the texture of the chicken.
Add the Sauce Just Before Baking
Don’t leave breaded chicken sitting under tomato sauce while you prepare the rest of dinner. Once the sauce touches the crust, the breadcrumbs begin absorbing moisture. Have the sauce and cheese ready, assemble the dish quickly, and put it straight into the oven.
Don’t Overcook the Chicken
Remember that the chicken cooks twice: first in the pan, then in the oven. Fry it primarily to develop the crust, and let the oven finish the cooking. Check the internal temperature rather than relying on cooking time alone, especially if your cutlets vary in thickness.
Also Read: Chicken Ragu
Can You Make Chicken Parmigiana Without Frying?
Yes. Baking the breaded chicken is a practical alternative when you want to use less oil or avoid frying several batches.
For better color and crunch, spread the panko breadcrumbs on a baking tray, toss them with 1 to 2 tablespoons of olive oil, and toast them at 200°C (400°F) for about 4 to 6 minutes, stirring once, until lightly golden. Let them cool before mixing with the Parmesan and paprika.
Coat the chicken using the same flour, egg, and breadcrumb method. Arrange the cutlets on a wire rack set over a baking tray, spray lightly with oil, and bake at 200°C (400°F) until nearly cooked through, usually around 12 to 16 minutes depending on thickness.
Add the tomato sauce and cheese, return to the oven, and continue baking until the cheese melts and the chicken reaches 74°C (165°F). The baked version will have a slightly different texture from shallow-fried chicken, but it can still turn out nicely crisp.
What to Serve with Chicken Parmigiana
Chicken Parmigiana is rich enough to be the centerpiece of a meal, so the best side dishes either complement the tomato sauce or provide something fresh to balance the cheese.
| Side Dish | Why It Works |
|---|---|
| Spaghetti | A classic pairing that makes good use of any extra tomato sauce. |
| Garlic Bread | Perfect for soaking up sauce and adding another savory element to dinner. |
| Green Salad | Fresh lettuce, cucumber, and a lemon dressing balance the richness of the cheese. |
| Roasted Vegetables | Zucchini, bell peppers, and broccoli add color and texture without making the meal too heavy. |
| Mashed Potatoes | A comforting alternative to pasta, especially for a family-style dinner. |
| Steamed Green Beans | A simple, lighter side that doesn’t compete with the flavors of the chicken. |
If serving with pasta, keep a little extra tomato sauce aside before assembling the chicken. Toss the cooked pasta with that sauce and finish with a small amount of Parmesan. This keeps the pasta flavorful without needing a separate dressing.
How to Store and Reheat Chicken Parmigiana
Refrigerating Leftovers
Allow leftover Chicken Parmigiana to cool briefly, then transfer it to an airtight container and refrigerate within two hours of cooking. Store at 4°C (40°F) or below and use within 3 to 4 days. The coating will soften during storage, but the flavor remains good.
Freezing
For the best texture, freeze the breaded chicken separately from the tomato sauce and cheese. Arrange the uncooked breaded cutlets on a tray and freeze until firm, then transfer to a freezer-safe container. Store at -18°C (0°F) and use within 2 to 3 months for best quality. Thaw in the refrigerator before cooking and cook the chicken completely.
You can also freeze fully cooked Chicken Parmigiana, although the breadcrumb coating will become softer once reheated.
Reheating
Preheat the oven to 180°C (350°F). Arrange the leftover chicken on a baking tray, cover loosely with foil if the cheese is already well browned, and heat for approximately 12 to 18 minutes, depending on thickness and temperature. Make sure the center reaches 74°C (165°F).
An air fryer also works well. Reheat at approximately 170°C (340°F) for 5 to 8 minutes, checking frequently. Microwaving is convenient, but it usually produces a softer breadcrumb coating.
Also Read: One Pot Broccoli Chicken Mac and Cheese
Common Mistakes to Avoid
Using Too Much Sauce
It is tempting to cover every inch of the chicken, but too much sauce quickly softens the crust. A moderate amount over the center gives you plenty of tomato flavor while keeping the edges crisp. Serve additional sauce on the side instead.
Frying in Oil That Isn’t Hot Enough
If the oil is too cool, the breadcrumbs absorb more oil before they become golden. This can leave the coating greasy. Allow the oil to return to the proper temperature between batches and avoid crowding the pan.
Skipping the Flour Layer
The flour might not seem particularly important, but it helps the egg cling to the chicken. Without it, the breadcrumb coating is more likely to separate while frying or cutting.
Leaving the Chicken in the Oven Too Long
The oven is mainly there to finish cooking the meat and melt the cheese. Extended baking can dry out the chicken and soften the crust, so check the temperature as soon as the cheese is melted.
Chicken Parmigiana Nutritional Information
The following values are approximate estimates for one serving, assuming the recipe makes four portions. They include the breaded chicken, tomato sauce, cheese, and an estimated amount of oil absorbed during shallow frying. Pasta, bread, salad dressing, and other side dishes are not included.
| Nutrient | Approximate Amount per Serving |
|---|---|
| Calories | 730 kcal |
| Protein | 60 g |
| Total Fat | 38 g |
| Saturated Fat | 14 g |
| Carbohydrates | 36 g |
| Dietary Fiber | 3 g |
| Total Sugars | 8 g |
| Sodium | 1,250 mg |
| Cholesterol | 250 mg |
Nutrition Note: These figures are estimates rather than laboratory-tested values. Actual nutrition depends on the brand of cheese and breadcrumbs, the size of the chicken portions, the amount of seasoning used, and how much oil the coating absorbs. Baking instead of shallow frying may reduce the total fat and calorie content.
Frequently Asked Questions
What Is the Difference Between Chicken Parmigiana and Chicken Parmesan?
There is no major difference in the dish itself. Chicken Parmesan is the name commonly used in the United States, while Chicken Parmigiana is widely used in Australia and elsewhere. Both generally refer to breaded chicken topped with tomato sauce and melted cheese.
Can I Use Chicken Thighs Instead of Chicken Breasts?
Yes. Boneless, skinless chicken thighs are a good option if you prefer darker, juicier meat. Flatten them to an even thickness and follow the same breading process. Because thighs vary in size and shape, use a meat thermometer to determine when they are fully cooked.
Can I Use Store-Bought Marinara Sauce?
Absolutely. A good-quality marinara sauce is a useful shortcut on busy evenings. Choose one with a thick consistency and a balanced tomato flavor. If it tastes a little flat, warm it with sautéed garlic, dried oregano, and fresh basil before spooning it over the chicken.
How Do I Stop the Breadcrumbs from Falling Off?
Start with chicken that has been patted dry, shake away excess flour, and press the breadcrumbs firmly into the egg-coated cutlets. Allow the coating to rest briefly before frying. Once the chicken is in the pan, avoid moving it around until the underside has formed a firm, golden crust.
Can I Prepare Chicken Parmigiana Ahead of Time?
Yes, and preparing the components separately gives the best results. Make the tomato sauce up to three days ahead and refrigerate it in an airtight container. You can also bread the chicken several hours before cooking and keep it covered in the refrigerator. Fry and assemble just before serving for the crispiest result.
Which Cheese Is Best for Chicken Parmigiana?
A combination of mozzarella and Parmesan works especially well. Mozzarella provides the stretchy, melted topping, while Parmesan brings a stronger, salty flavor. Low-moisture mozzarella is particularly useful because it releases less water during baking.
Can I Make Chicken Parmigiana Gluten-Free?
Yes. Replace the all-purpose flour with a suitable gluten-free flour blend and use certified gluten-free breadcrumbs. Check that the seasonings, tomato products, and other packaged ingredients are also gluten-free if you are preparing the dish for someone with celiac disease.