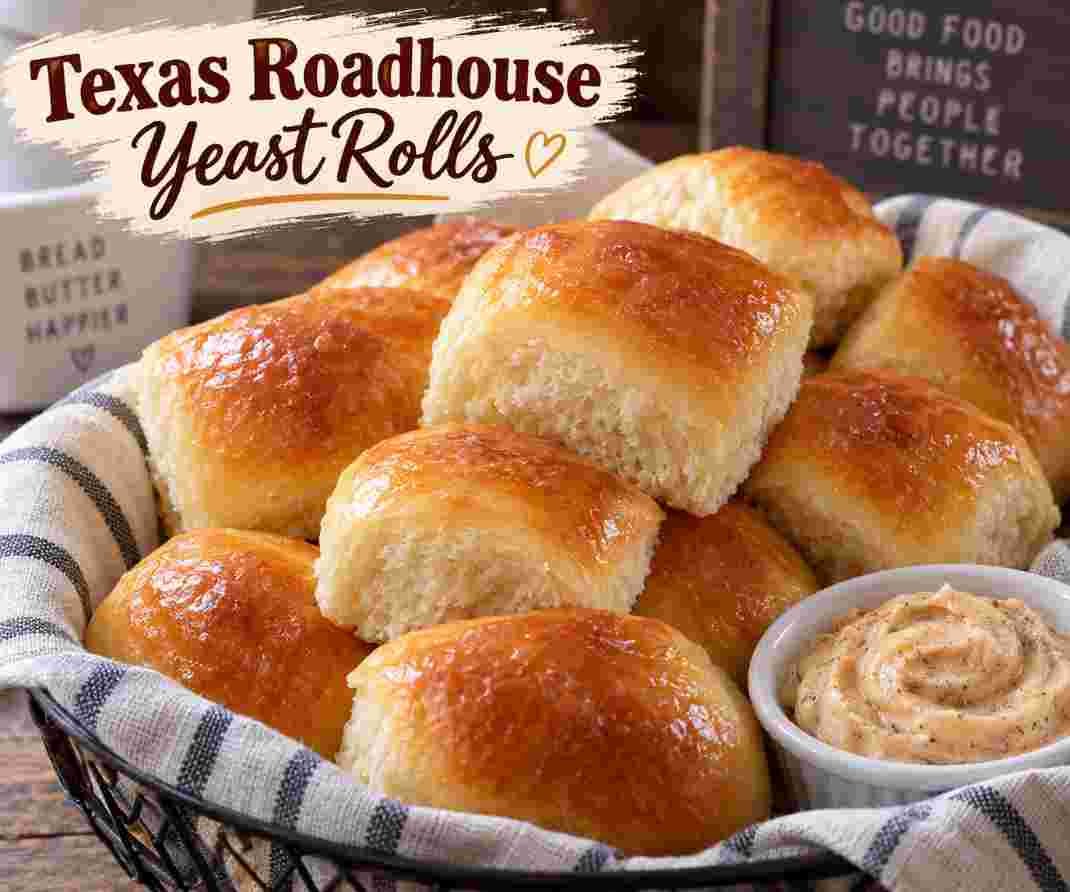
Soft, slightly sweet, buttery and wonderfully fluffy, these Texas Roadhouse yeast rolls are the kind of dinner rolls that disappear before the main course even hits the table. They have a tender inside, a lightly golden top and just enough sweetness to make them especially good with a swipe of cinnamon honey butter. The good news is that you don’t need a restaurant kitchen to make them. With a few basic ingredients and a little patience while the dough rises, you can bake a warm batch at home.
What You Can Do Better
The biggest difference between good homemade yeast rolls and great ones is usually the dough. Don’t rush the rising time, and don’t add a lot of extra flour just because the dough feels slightly tacky. A soft dough gives you softer rolls. Also, pay attention to the temperature of the milk when activating the yeast. It should be warm rather than hot. If the milk is too hot, the yeast can lose its ability to rise.
For evenly baked rolls, try to cut the dough into pieces that are roughly the same size. And once the rolls come out of the oven, brush them with melted butter while they’re still warm. That simple step gives the tops a soft, buttery finish and adds a lot of flavor.
Ingredients
| Ingredient | Amount |
|---|---|
| Active dry yeast | 1 packet (about 2 1/4 teaspoons) |
| Warm milk | 1 1/4 cups |
| Granulated sugar | 1/3 cup |
| Unsalted butter, softened | 1/4 cup |
| Large egg | 1 |
| Kosher salt | 1 teaspoon |
| All-purpose flour | 3 1/2 to 4 cups |
| Unsalted butter, melted | 3 tablespoons, for brushing |
Also Read: Slow Cooker Meat Stew
How to Make Texas Roadhouse Yeast Rolls
1. Activate the Yeast
Pour the warm milk into a small bowl and stir in the sugar. Sprinkle the active dry yeast over the milk and leave it alone for about 5 minutes. The mixture should become foamy on the surface. This is a good sign that the yeast is active and ready to use.
The milk should be warm, not steaming hot. If you have a kitchen thermometer, aim for roughly 105 to 110°F. If the yeast mixture stays completely flat and doesn’t foam, it’s better to start again with fresh yeast than to continue with dough that may never rise.
2. Make the Dough
Transfer the yeast mixture to a large mixing bowl or the bowl of a stand mixer fitted with a dough hook. Add the softened butter, egg, salt and about 2 cups of the flour. Mix until the ingredients come together into a smooth batter-like mixture.
Gradually add the remaining flour while mixing. Stop adding flour when the dough forms a soft ball and feels tacky but isn’t sticking heavily to your hands or the sides of the bowl. You may not need the entire 4 cups, so add the flour gradually instead of putting it all in at once.
3. Knead the Dough
If you’re using a stand mixer, continue kneading the dough for about 2 to 3 minutes. For a hand-kneaded dough, turn it onto a lightly floured surface and knead until it becomes smooth and elastic.
The dough should remain soft. Adding too much flour can make the finished rolls heavy instead of light and fluffy.
4. Let the Dough Rise
Lightly grease a large bowl and place the dough inside. Turn it once so the outside is lightly coated. Cover the bowl with a clean kitchen towel and place it somewhere warm and draft-free.
Let the dough rise for about 45 to 60 minutes, or until it has roughly doubled in size. The exact time can vary depending on the temperature of your kitchen, so use the size of the dough as your guide rather than watching the clock.
5. Roll Out the Dough
Once the dough has doubled, gently press it down to release some of the air. Let it rest for a few minutes before rolling.
Lightly flour your work surface and roll the dough into a rectangle about 12 inches by 8 inches and roughly 1/2 inch thick. Try to keep the thickness even so the rolls bake at the same rate.
6. Cut the Rolls
Cut the dough into approximately 24 to 30 pieces. A pizza cutter or sharp knife makes this step quick and easy. The pieces don’t have to be perfectly identical, but keeping them close in size will help them finish baking at the same time.
Arrange the pieces on lightly greased or parchment-lined baking sheets, leaving a little room between them for the second rise.
7. Let Them Rise Again
Cover the shaped rolls with a clean kitchen towel and let them rise for another 45 to 60 minutes. They should look noticeably puffy and close to doubled in size.
This second rise is important. It gives the rolls their light texture, so resist the temptation to skip it when you’re in a hurry.
8. Bake the Rolls
About 20 minutes before the second rise is finished, preheat your oven to 350°F.
Bake the rolls for approximately 12 to 15 minutes, or until the tops are lightly golden brown. Keep an eye on them toward the end because ovens vary, and you don’t want to overbake these rolls.
9. Finish with Butter
Remove the rolls from the oven and immediately brush the tops with melted butter. The warmth of the rolls helps the butter soak slightly into the surface, giving them that soft, rich finish.
Serve them warm with butter, honey butter or cinnamon honey butter.
Also Read: Stuffed Peppers with Ground Beef
Recipe at a Glance
| Details | Information |
|---|---|
| Prep Time | 15 minutes |
| Rise Time | About 1 1/2 to 2 hours |
| Baking Time | 12 to 15 minutes |
| Total Time | About 2 1/2 hours |
| Yield | 24 to 30 rolls |
| Oven Temperature | 350°F (175°C) |
Tips for Soft and Fluffy Rolls
- Don’t overheat the milk: Very hot milk can prevent the yeast from working properly. Warm milk is all you need.
- Watch the flour: Add it gradually. The dough should be soft and slightly tacky rather than stiff.
- Give the dough enough time: If your kitchen is cool, the dough may take longer than an hour to double.
- Keep the pieces similar in size: This helps the rolls bake evenly.
- Brush with butter while warm: It gives the finished rolls a richer flavor and softer surface.
- Use fresh yeast: If your yeast doesn’t become foamy after sitting in warm milk, don’t rely on it for the recipe.
Also Read: Honey Sriracha Chicken Wings
Can You Use Instant Yeast?
Yes. Instant yeast can be used in place of active dry yeast. Since instant yeast doesn’t require the same separate proofing step, you can mix it directly with the dry ingredients. The dough will still need time to rise before shaping and again after the rolls are cut.
What to Serve with Texas Roadhouse Yeast Rolls
These rolls are especially good alongside hearty dinners. Serve them with roast chicken, steak, pot roast, mashed potatoes, soups or a simple Sunday dinner. They also make a nice addition to a holiday table because you can prepare a large batch at once.
How to Store Leftover Rolls
Once completely cooled, keep the rolls in an airtight container or wrap them well. They can stay at room temperature for several days. For longer storage, place the cooled rolls in a freezer-safe bag or container and freeze them. Let frozen rolls thaw at room temperature and warm them gently before serving.
Nutrition Information
The following nutrition estimate is approximate and can vary depending on the exact ingredients, portion size and number of rolls made.
| Nutrient | Approximate Amount |
|---|---|
| Calories | About 325 kcal |
| Carbohydrates | 61 g |
| Protein | 9 g |
| Total Fat | 5 g |
| Saturated Fat | 3 g |
| Cholesterol | 17 mg |
| Sodium | 107 mg |
| Fiber | 2 g |
| Sugar | 4 g |
Also Read: Country Fried Chicken
Frequently Asked Questions
Why didn’t my yeast rolls rise?
The most common reasons are inactive yeast, milk that was too hot or cold, or a kitchen that is too cool. If the yeast doesn’t become foamy when activated, start again with fresh yeast. If the dough is simply taking a long time to rise, give it more time in a warmer spot.
Can I make these rolls without a stand mixer?
Absolutely. A stand mixer makes kneading easier, but these rolls can be made by hand. Mix the dough in a large bowl and then knead it on a lightly floured surface until it becomes smooth and elastic.
How do I make the rolls extra soft?
Keep the dough soft and avoid adding too much flour. Also, don’t skip either rising period. Both help create the light, tender texture you’re looking for.
Can I freeze Texas Roadhouse yeast rolls?
Yes. Cool the baked rolls completely, place them in an airtight freezer-safe container or bag and freeze. Thaw them at room temperature and warm them gently before serving.