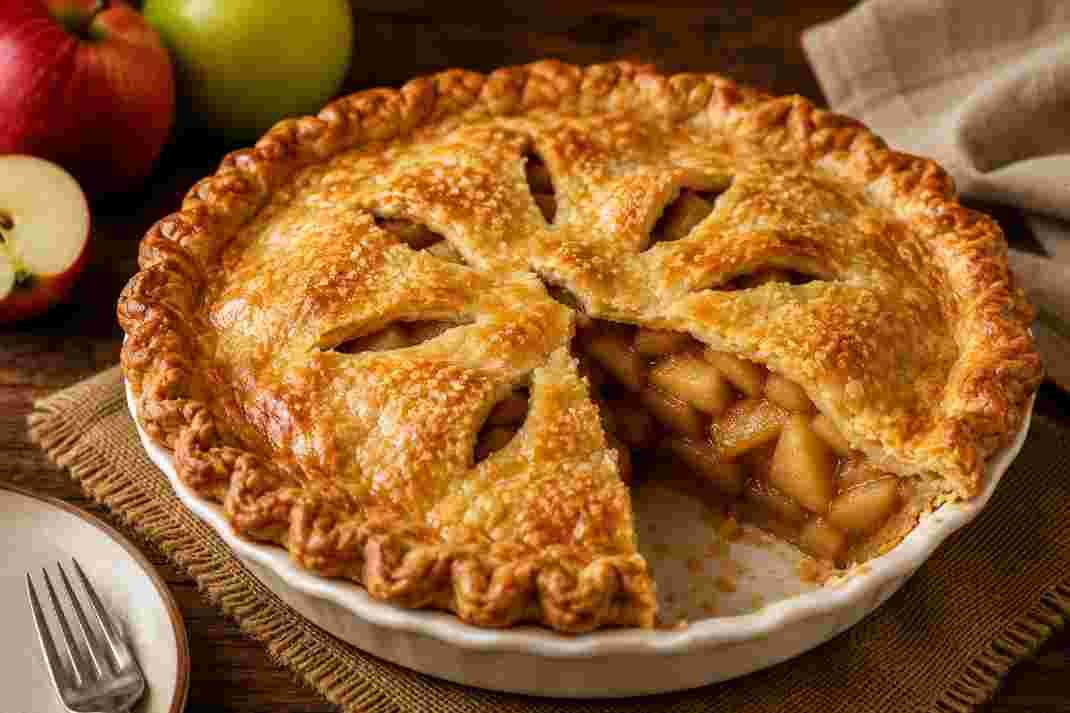
There is something timeless about a homemade apple pie. The smell of cinnamon drifting through the kitchen, the buttery crust turning beautifully golden, and the bubbling apple filling are enough to make any house feel warm and welcoming. This is the apple pie I come back to every autumn and holiday season, but honestly, it deserves a place on the table all year long.
After experimenting with different techniques, I found that taking a little extra time with the apples makes a remarkable difference. Instead of relying on raw apples to soften inside the pie, gently baking them first creates a richer flavor, prevents a watery filling, and gives every slice a generous amount of perfectly tender fruit. The result is a pie that slices neatly, has a crisp bottom crust, and tastes every bit as comforting as it looks. Inspired by classic baking techniques while developed in my own kitchen, this recipe focuses on balance rather than excessive sweetness. Every bite delivers flaky pastry, warm spices, and naturally sweet apples that still hold their shape.
What You Can Do Better
- Use tart baking apples like Granny Smith for the best balance of sweetness and texture.
- Pre-bake the apple slices before assembling the pie to reduce excess moisture.
- Allow the pie to cool for at least 3 hours before slicing so the filling can set properly.
- Brush the crust lightly with egg wash for an even golden finish.
- Place the pie on a baking sheet to catch any bubbling juices.
- Serve slightly warm with vanilla ice cream or freshly whipped cream for the ultimate dessert.
Recipe Overview
| Category | Details |
|---|---|
| Recipe | Classic Apple Pie |
| Prep Time | 35 minutes |
| Cook Time | 1 hour 15 minutes |
| Cooling Time | 3 hours |
| Total Time | Approximately 4 hours 50 minutes |
| Servings | 8 slices |
Also Read: French Apple Cake
Ingredients
For the Pie Crust
- 2½ cups all-purpose flour
- 1 teaspoon salt
- 1 tablespoon granulated sugar
- 1 cup cold unsalted butter, cubed
- 6 to 8 tablespoons ice water
For the Apple Filling
- 8 medium Granny Smith apples, peeled, cored and sliced
- ¾ cup light brown sugar
- 2 tablespoons granulated sugar
- 2 teaspoons ground cinnamon
- ¼ teaspoon ground nutmeg
- ¼ teaspoon ground ginger
- 2 tablespoons unsalted butter
- 2 tablespoons cornstarch
- 1 tablespoon lemon juice
- 1 teaspoon vanilla extract
- ¼ teaspoon salt
For the Finish
- 1 beaten egg
- 1 tablespoon coarse sugar (optional)
Also Read: Baked Apples Recipe
How to Make My Perfect Apple Pie
Step 1: Prepare the Dough
Mix the flour, sugar, and salt in a large bowl. Cut in the cold butter until the mixture resembles coarse crumbs. Gradually add ice water until the dough comes together. Divide into two discs, wrap well, and refrigerate for at least one hour.
Step 2: Bake the Apples
Heat the oven to 350°F (175°C). Toss the sliced apples with brown sugar, granulated sugar, cinnamon, nutmeg, ginger, salt, lemon juice, and vanilla. Spread the apples evenly over a baking tray and bake for 20 to 25 minutes until they are just tender but still hold their shape. Allow them to cool completely.
Step 3: Prepare the Filling
Transfer the cooled apples to a large bowl. Stir in the cornstarch and any juices collected during baking. Add the butter and gently mix until everything is evenly coated.
Step 4: Roll the Bottom Crust
Roll one portion of dough into a large circle and fit it into a 9-inch pie dish. Trim the edges while leaving a slight overhang. Chill the crust for 15 minutes before filling.
Step 5: Fill the Pie
Spoon the apple mixture into the prepared crust, arranging the apples evenly and pressing lightly to remove air pockets. Slightly mound the center for a traditional bakery-style appearance.
Step 6: Add the Top Crust
Roll out the second dough disc and either cover the pie completely with small vents cut into the top or create a lattice design. Seal and crimp the edges. Brush with beaten egg and sprinkle with coarse sugar if desired.
Step 7: Bake
Bake at 400°F (200°C) for 20 minutes. Reduce the temperature to 375°F (190°C) and continue baking for another 40 to 45 minutes until the crust is deep golden and the filling bubbles through the vents.
Step 8: Cool Before Serving
Allow the pie to cool on a wire rack for at least three hours. This resting time helps the filling set properly and makes every slice clean and beautiful.
Also Read: Paloma Drink Recipe
Serving Suggestions
This apple pie is wonderful on its own, but it becomes truly unforgettable when served slightly warm with vanilla ice cream, freshly whipped cream, or a drizzle of warm caramel sauce. A cup of coffee or hot chai also pairs beautifully with its comforting flavors.
Storage Tips
- Store covered at room temperature for up to 2 days.
- Refrigerate for up to 5 days.
- Freeze individual slices or the whole pie for up to 3 months.
- Reheat slices in the oven at 325°F (160°C) for about 10 minutes to restore the flaky crust.
Also Read: Mini Cinnamon Muffins
Nutrition Information
Approximate values per serving.
| Nutrient | Amount |
|---|---|
| Calories | 445 kcal |
| Carbohydrates | 58 g |
| Protein | 4 g |
| Fat | 22 g |
| Saturated Fat | 13 g |
| Fiber | 5 g |
| Sugar | 28 g |
| Sodium | 210 mg |
| Potassium | 240 mg |
Also Read: Buffalo Chicken Pizza Recipe
Frequently Asked Questions
Which apples work best for apple pie?
Granny Smith apples are a favorite because they stay firm while baking and provide a pleasant tartness that balances the sweetness.
Can I prepare the pie ahead of time?
Yes. You can assemble the entire pie one day in advance and refrigerate it before baking.
Why should the apples be baked first?
Pre-baking removes excess moisture, concentrates the apple flavor, and helps prevent a soggy crust while ensuring the filling cooks evenly.
How do I keep the crust from browning too quickly?
If the edges begin to darken before the pie is fully baked, loosely cover them with strips of aluminum foil for the remaining baking time.
Can I freeze this pie?
Absolutely. Bake the pie, cool it completely, wrap it tightly, and freeze for up to three months. Thaw overnight in the refrigerator before reheating.