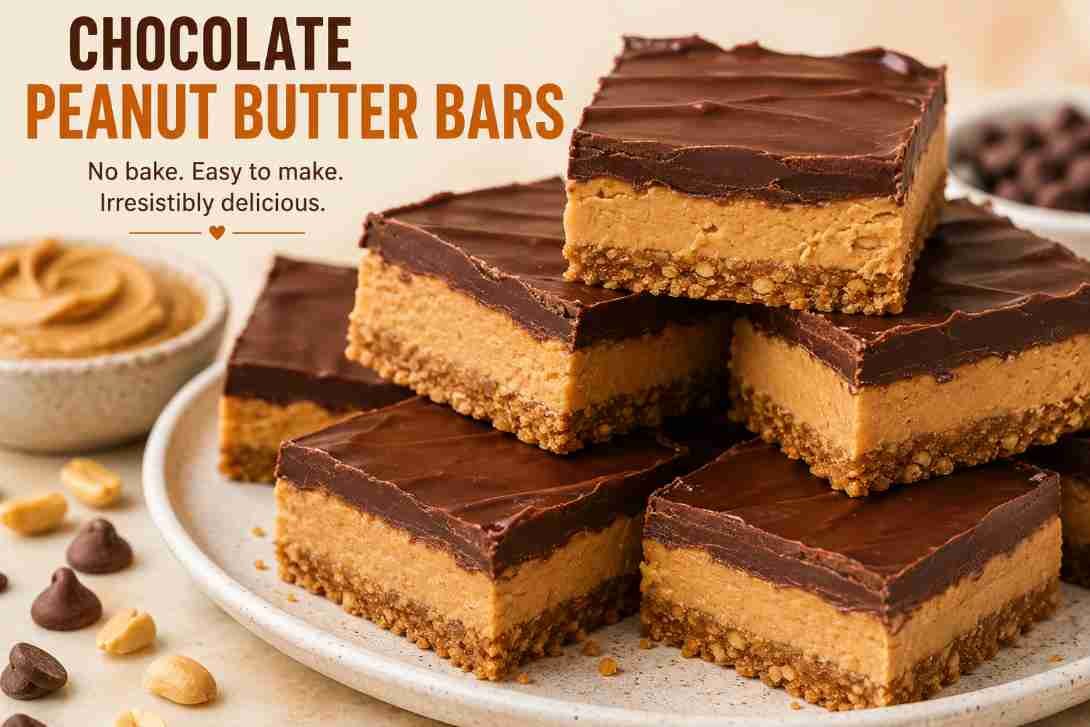
These Chocolate Peanut Butter Bars are the kind of dessert you can make when you want something sweet without turning on the oven. They have a buttery biscuit base, plenty of creamy peanut butter, and a smooth chocolate topping that sets into a satisfying little snap. The whole thing comes together quickly, then the refrigerator does the rest.
Chocolate Peanut Butter Bars
If you love the combination of chocolate and peanut butter, these bars are hard to resist. The base is soft and slightly crumbly, while the chocolate layer gives each bite a rich finish. They are perfect for parties, lunchbox treats, afternoon tea, or those moments when you need an easy dessert without much preparation.
Ingredients
For the Peanut Butter Base
| Ingredient | Amount |
|---|---|
| Plain sweet biscuits or graham crackers, finely crushed | 1 cup |
| Powdered sugar | 1 cup |
| Creamy peanut butter | 3/4 cup |
| Salted butter, melted | 1/2 cup (about 115 g) |
For the Chocolate Topping
| Ingredient | Amount |
|---|---|
| Dark or semi-sweet chocolate chips | 1 cup |
| Creamy peanut butter | 2 tablespoons |
Also Read: Lemonade Scones
How to Make Chocolate Peanut Butter Bars
1. Prepare the Pan
Line an 8-inch square baking pan with parchment paper, leaving a little overhang on the sides. This makes it much easier to lift the chilled bars out later. Lightly grease the pan first if needed so the parchment stays in place.
2. Make the Peanut Butter Base
Add the crushed biscuits, powdered sugar, melted butter, and peanut butter to a large bowl. Stir until everything is evenly combined and the mixture looks thick and slightly sticky. You should be able to press it together easily with the back of a spoon.
3. Press Into the Pan
Transfer the mixture to the prepared pan and press it down firmly into an even layer. Take a little extra time here because a firmly packed base will give you neater bars once chilled.
4. Make the Chocolate Topping
Place the chocolate chips and 2 tablespoons of peanut butter in a microwave-safe bowl. Heat in short intervals, stirring between each one, until the chocolate is smooth and glossy. You can also melt the mixture gently over a pan of simmering water.
5. Add the Chocolate Layer
Pour the melted chocolate mixture over the peanut butter base. Spread it into an even layer with a spatula. If you like, drag the tip of a knife through the chocolate to create simple swirls.
6. Chill Until Firm
Refrigerate the bars for about 1 1/2 hours, or until the chocolate topping has set and the base feels firm. Let the slab sit at room temperature for a few minutes before cutting. This helps the chocolate slice more cleanly instead of cracking.
7. Slice and Serve
Lift the chilled bars from the pan using the parchment paper. Cut into 16 squares, or make smaller pieces if you’re serving them at a party. They are best enjoyed slightly softened rather than straight from a very cold refrigerator.
Also Read: Easy Chocolate Truffles
What You Can Do Better
- Pack the base firmly: Press the mixture down well for bars that hold together when sliced.
- Use smooth peanut butter: Creamy peanut butter gives the base a softer, more even texture. Crunchy peanut butter works too if you want some extra texture.
- Melt the chocolate gently: Chocolate can become grainy if overheated, so use short bursts and stir frequently.
- Let the bars warm slightly before cutting: A few minutes on the counter makes the chocolate easier to slice without large cracks.
- Try a pinch of sea salt: A small sprinkle over the finished chocolate layer can balance the sweetness and make the peanut butter flavor stand out.
- Choose your biscuits carefully: Plain sweet biscuits work well, but you can experiment with graham crackers or other crisp biscuits depending on what you have available.
Recipe Tips and Variations
Use milk chocolate: If you prefer a sweeter, creamier bar, replace the dark chocolate with milk chocolate.
Go extra chocolatey: Add a small handful of finely chopped chocolate to the peanut butter base before pressing it into the pan.
Add a salty finish: A little flaky sea salt on top is an easy way to create a sweet-and-salty contrast.
Make smaller bites: These bars are quite rich, so cutting them into 20 or 24 smaller pieces is a good idea for parties or dessert platters.
Also Read: Lamingtons Recipe
How to Store Chocolate Peanut Butter Bars
Keep the bars in an airtight container in the refrigerator. They can be stored for around 5 days. If your kitchen is particularly warm, refrigeration is the better option because the chocolate topping and buttery base can soften at room temperature. For the best texture, let a piece sit out for a few minutes before eating.
Nutrition Information
The following nutrition estimate is based on cutting the recipe into 16 bars. Actual values can vary depending on the biscuits, chocolate, peanut butter, and other brands used.
| Nutrient | Approximate Amount Per Bar |
|---|---|
| Calories | 248 kcal |
| Carbohydrates | 21.9 g |
| Protein | 4.9 g |
| Total Fat | 16.7 g |
| Saturated Fat | 7.4 g |
| Cholesterol | 18 mg |
| Sodium | 156 mg |
| Fiber | 1.4 g |
| Sugar | 16.2 g |
Nutrition values are approximate and will vary depending on the specific ingredients and brands used.
Also Read: Anzac Biscuits
Frequently Asked Questions
Do Chocolate Peanut Butter Bars need to be baked?
No. These are completely no-bake bars. The base is mixed and pressed into the pan, while the chocolate topping is simply melted before chilling everything until firm.
Can I use crunchy peanut butter?
Yes. Crunchy peanut butter gives the bars little bits of roasted peanut throughout the base. For the smoothest texture, creamy peanut butter is the easiest choice.
Can I use milk chocolate instead of dark chocolate?
Absolutely. Milk chocolate makes the topping sweeter and softer in flavor, while dark or semi-sweet chocolate gives the bars a deeper chocolate taste.
Why is my chocolate cracking when I cut the bars?
The chocolate may be too cold or the knife may be too cold. Let the bars sit at room temperature for a few minutes, then use a sharp knife to make clean cuts.
Can I freeze these bars?
Yes. Wrap the bars well and store them in an airtight freezer-safe container. Thaw them in the refrigerator and allow them to soften slightly before serving.